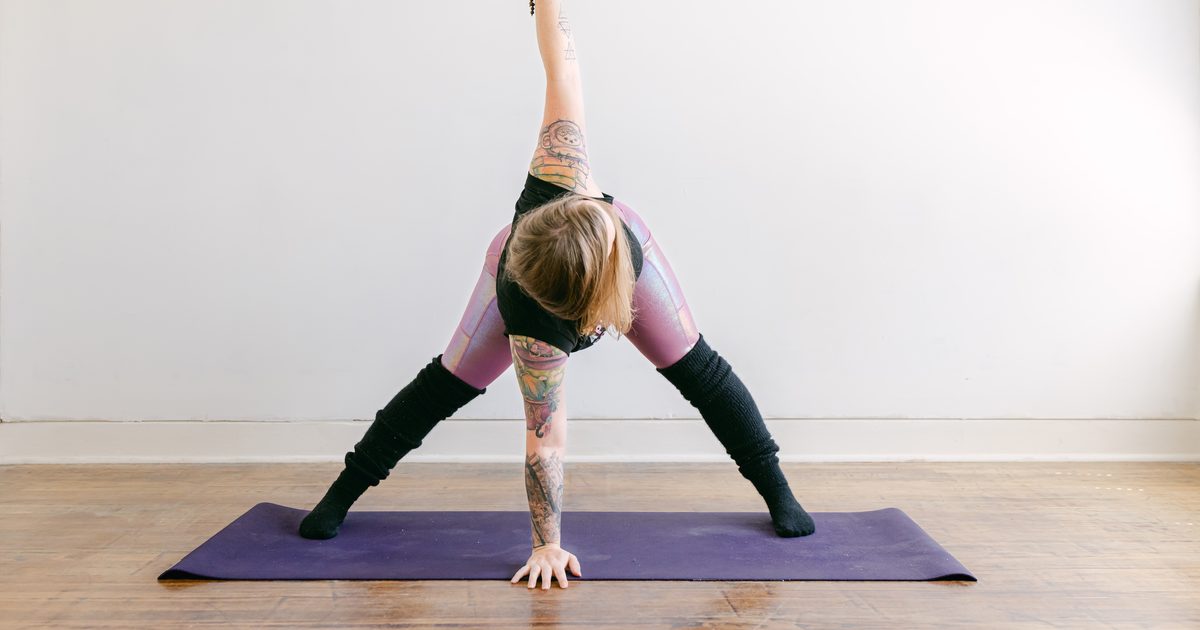
Our theme in class this week was simple: let something hold you.
Most of us spend the whole day holding things up. The schedule. The house. Everybody’s feelings. So when we finally get on the mat, we keep doing it. We grip the pose. We clench our way through balance. We act like nothing is allowed to help.
And then, somewhere in the middle of class, it got very literal. Because there’s a part of your body that holds you up all day long, and it almost never gets asked how it’s doing.
Your hips.
The part of you that holds everything up
Think about where your weight lives when you stand. Your head sits on your spine, your spine sits on your pelvis, and your pelvis sits on two ball-and-socket joints at the tops of your thighs. Every step you take, every time you stand on one foot to pull on a sock, your hips are holding the whole upper half of you.
They’re built for it. The hip is one of the most stable joints in the body, with a deep socket and big, strong muscles all the way around it. It’s also built to move a LOT: forward and back, out to the side, and around in rotation.
Here’s the catch. Most of our days only use a tiny slice of that. We sit, we stand, we walk in straight lines. Hips that only ever move forward and back start to feel stiff in every other direction, and the muscles that steady us from the side get quieter and quieter.
That’s when hips start to feel “tight.” Often they’re not short. They’re just under-asked.
On one leg, a few small muscles hold you level
Quick anatomy, plain language. On the outside of each hip sit the gluteus medius and gluteus minimus, the hip abductors. When you stand on one leg, they’re the muscles that keep the opposite side of your pelvis from dropping. Every single step you take, for a split second, you’re on one leg, and they’re holding you level.
When they’re not pulling their weight, you can often see it: the free hip sags, the knee wobbles in, or the whole torso tips over the standing leg to compensate. You’ll feel it as a wobbly balance, a cranky outer hip, or a low back that seems to do too much.
The neat part is that this is very trainable, and you don’t need to lie on the floor to do it. Standing work, with something to hold onto, is exactly where these muscles do their real job.
What the research really says
I’ll keep this honest.
Hip strength matters for balance. A 2020 modeling study in PLOS ONE found that standing on one leg takes a big share of the hip abductors’ strength, and that hip strength plays a larger role in one-legged balance than clinical tests usually give it credit for (Mirshams Shahshahani and Ashton-Miller, 2020). The limits: it’s a computer model of a simplified body, built from averaged data, not a trial on real students. It tells us where to look, not exactly what happens in your body.
Balance training works. The big one here is a 2019 Cochrane review of 108 randomized trials and more than 23,000 people aged 60 and up living at home. Balance and functional exercise, the kind of standing, weight-shifting work in this class, cut the rate of falls by about 24%, and the reviewers rated that evidence high certainty (summary on PEDro).
If you’re 40 or 50, that research isn’t about you yet. But I think of it as the long game. The balance you’ll want at 75 gets built now, a few minutes at a time.
What the research does NOT say: that one 12-minute class will fix your hips, or that a hip “opening” will melt away a back problem. Hips get better the way everything gets better, a little, often.
Short on time this week? Start Small is five 5-minute flows for the days you have nothing left. It's free. Get Start Small.
A 2-minute self-test: how are your hips holding you?
Do this before class, then again after.
1. The one-leg stand. Stand near a counter. Lift one foot a few inches and stay for 30 seconds without holding on, if you can. Watch in a mirror or feel it: does the hip of your lifted leg drop? Does your standing knee drift in? Switch sides. Notice which side feels shakier.
2. The knee circle. Holding the counter, lift one knee to about hip height and slowly draw a circle with it, out to the side and back around. Is the circle smooth, or does it get jumpy and small on the way out? Switch sides.
3. The standing figure four. Hands on the counter, cross one ankle over the opposite knee and sit back just a little. Where do you feel it, and how far can you sit before something says no?
If one side wobbled, the circle got choppy, or the figure four felt like a brick wall, that’s your hips raising their hand. They want more directions to move in.
The 12-minute class
Grab two blocks if you have them. A stack of books works, or a chair back or counter for balance. No getting down to the floor, so this works in your kitchen, your office, or right after you get out of the car. Options for every body, so come as you are.
Letting something hold you, one step at a time
The whole class is built around one idea: let something hold some of your weight, so your hips can learn to move without you bracing against the floor. Each part has one job, one cue, and one mistake I see ALL the time.
Let the floor hold you. Standing hip hikes. Cue: lift from the side waist. Stand on one leg and let the other hip drop, then hike it up. The common mistake is leaning your whole torso to make it happen. Keep the shoulders level and let the movement live in the pelvis. This is your hip abductors waking up.
Let a block hold your hand. Slow hip rotations, one leg at a time, hand resting on a block or the wall. Cue: slow circles, no momentum. The mistake is swinging the leg like a pendulum. Fast feels easier because momentum does the work. Slow is where the strength is, and where the hip learns it’s safe to move.
Let your seat be held. Figure-four chair, then bent-knee warrior III reps. Cue: center leads. The mistake in figure four is cranking the knee down. Let the outer hip open on its own. In warrior III, the mistake is reaching for a long, flat line. Keep the standing knee bent, hinge only as far as you can stay steady, and let the block under your hand take the weight. Short and stable beats long and wobbly.
Let your legs hold the shape. Wide-leg forward fold, then a standing twist with one foot on the block. Cue: turn from the ribs, not the knee. The mistake in the twist is letting the knee swing in to fake more rotation. Keep the knee pointing forward, and let the turn come from your middle.
Let the twist hold you. Twisted lunge into twisted chair. Cue: hug midline. The mistake is collapsing into the back knee. Draw the legs toward each other like you’re squeezing a block between them, and the whole shape gets lighter.
Let it all come together. Warrior II, reverse warrior, windmill, then down to the ground. Cue: soften the front knee. The mistake is locking out the back leg and hanging on the joint. Keep a micro-bend so the muscles stay on, then let yourself come down slowly at the end. You held yourself up for twelve minutes. You get to let the floor take over.
When you finish, do the self-test again. Most people notice the one-leg stand is a little quieter and the knee circle gets bigger and smoother.
Why bracing makes it harder
Here’s the part I love. When balance feels hard, most of us grip. Toes clawing the mat, jaw tight, breath held. It feels like effort is the same as stability.
It isn’t. Bracing makes everything rigid, and a rigid body can’t make the tiny adjustments that keep you upright. That’s why a light touch on a wall or a block often makes you steadier, not weaker. Your body gets one more piece of information about where it is in space, and it can finally relax enough to balance.
So if you need the block the whole time? Good. That IS the practice. Letting something hold you isn’t cheating. It’s how the hips learn. (If you want the bigger picture of why controlled movement beats long, passive stretching, it’s all in What is mobility yoga?)
Make it stick off the mat
- Brush your teeth on one foot. Two minutes, switch halfway. Hold the counter if you need to.
- Circle your knees while the coffee brews. Five slow circles each way, each leg.
- Take the stairs like a test. Watch that your knee tracks over your toes on every step.
- Practice a little, often. Two or three short sessions a week beat one long one.
When to see a professional
If your hip pain is sharp, sits deep in the groin, comes with clicking and catching, numbness or tingling down your leg, or wakes you at night, check in with a doctor or physical therapist first. And if you’ve had a recent fall or feel dizzy when you stand, get that looked at before you work on balance. Yoga is a great companion to care, not a replacement for it.
Let something hold you
Your hips hold you up all day. They deserve a turn being held. A block under your hand, a wall at your side, the floor at the end of class. None of it makes you less strong. It’s what lets the strength show up.
So this week, let ONE thing hold you. Then come as you are.
What was it for you? A wall, a pillow, a friend on the phone? I’d love to know.
Want an hour that leaves you lighter? Practice with me live at Feel Good Flow, Wednesdays at 6pm CT, online. Camera off is totally fine, pay what fits, and the replay is included. Save your spot.
Take the free 12-minute class